>>
30-MINUTE MEALS! Get the email series now →


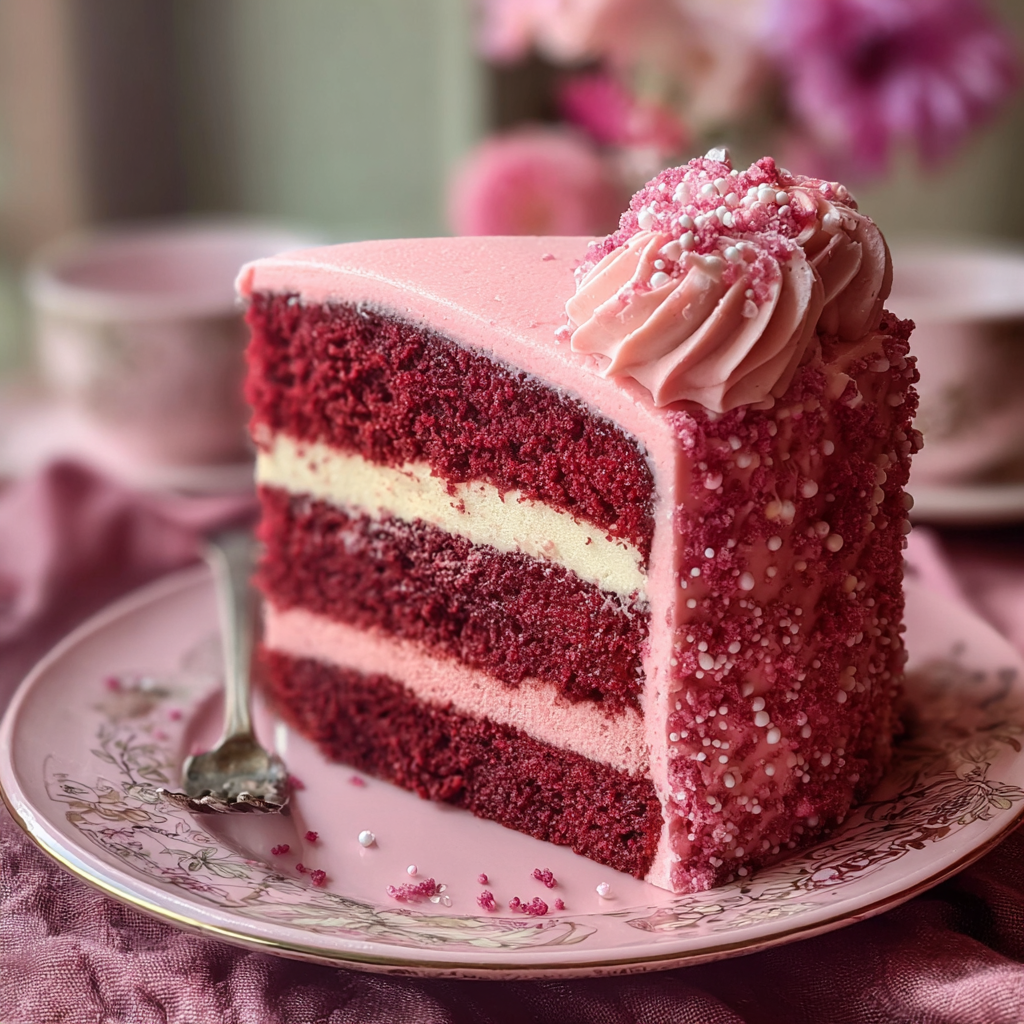
A tender, rosy-layered cake with creamy vanilla cream cheese frosting — perfect for celebrations, baby showers, and cozy weekend baking.

This Pink Velvet Cake has become my go-to celebration cake whenever I want something that feels festive but not fussy. I first developed this version in a tiny rental kitchen while planning a surprise brunch for a childhood friend. I wanted a cake that looked beautiful on the table, tasted classic, and used ingredients I already had on hand. The result was a soft, moist crumb tinted a delicate rose that always draws compliments. The texture sits somewhere between a buttery sponge and a moist butter cake — light enough to be delicate, substantial enough to satisfy.
I discovered how important technique was with this cake: simple changes like using room-temperature ingredients, properly creaming the butter and sugar, and not overmixing the flour yield a tender crumb every time. The frosting is a tangy vanilla cream cheese buttercream that balances the sweetness and keeps each slice from feeling heavy. Over the years this version has shown up at birthdays, baby showers, and weekday afternoons when the oven smells like nostalgia. It’s approachable, forgiving, and endlessly customizable.
I remember my sister’s reaction the first time she tasted this — she closed her eyes and said it tasted like a childhood bakery but lighter. Friends raved about the flavor balance and how the frosting wasn’t overly sweet. Because the technique is straightforward, I’ve taught several novice bakers to make it with success; it’s the kind of recipe that builds confidence.
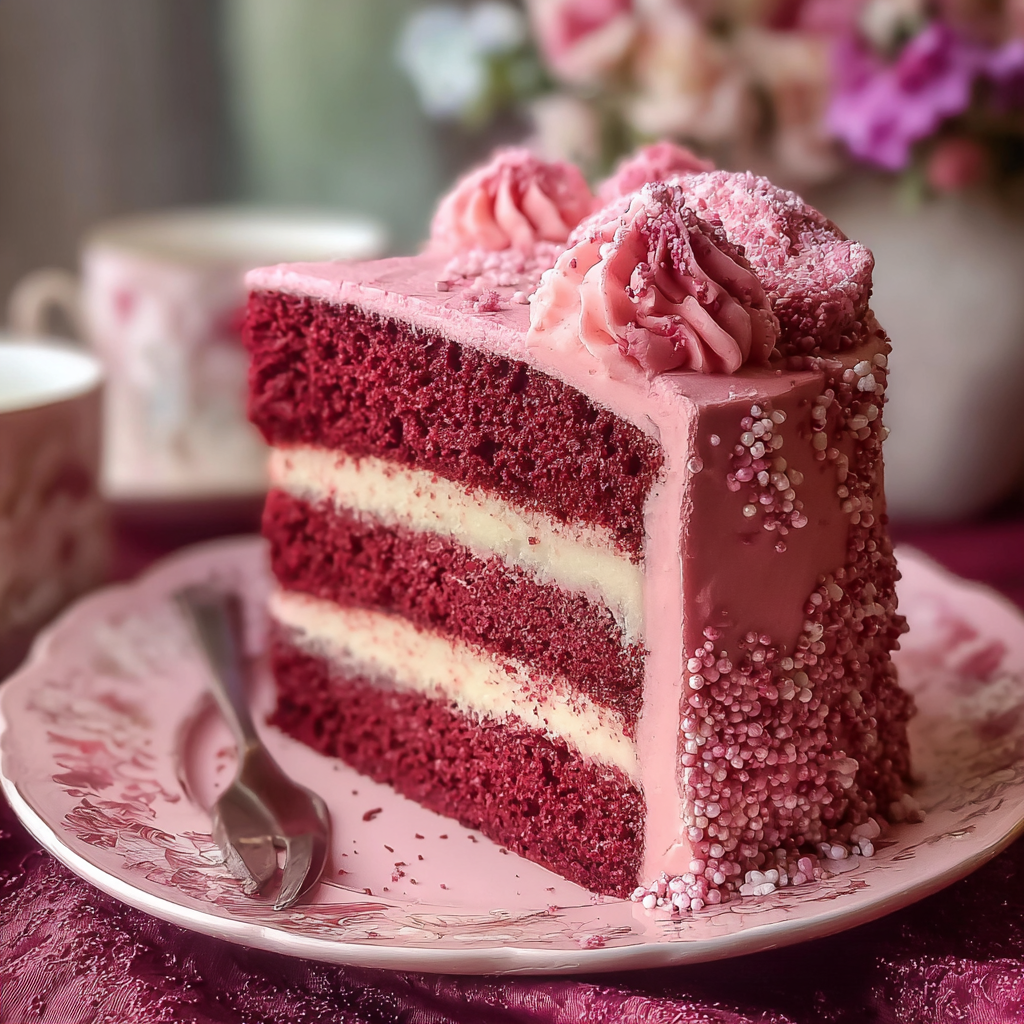
One of my favorite things about this cake is how reliably it brings people together. I’ve taken it to potlucks where strangers asked for the recipe, and it was the centerpiece at a small backyard shower where we served slices with fresh berries. The tang of the cream cheese frosting cuts through the sweetness, so each bite feels balanced. Baking it teaches patience — chilling between coats and trusting your intuition when coloring makes all the difference.
For short-term storage leave the frosted cake in the refrigerator covered with a cake dome or loosely tented with plastic wrap to prevent the frosting from picking up fridge odors. Bring to room temperature before serving for the best texture and flavor — 30 to 60 minutes depending on slice thickness. If you need to freeze, wrap individual unfrosted layers tightly in plastic and then foil; freeze up to 3 months. Thaw overnight in the refrigerator and finish frosting the next day to preserve freshness and presentation.
If you don’t have buttermilk, combine 1 tablespoon white vinegar or lemon juice with enough milk to reach 1 cup and let it sit 5 minutes. For a dairy-free version, use vegan butter and a nondairy cream cheese substitute, but expect a slightly different tang and texture. Swap almond extract for an extra 1/2 teaspoon vanilla if allergies are a concern. To make gluten-free layers, substitute a 1-to-1 gluten-free flour blend and add 1/2 teaspoon xanthan gum if the blend lacks it; bake a few minutes longer and test for doneness.
Serve slices with a spoonful of macerated strawberries or a scattering of fresh raspberries to enhance the pink theme and add a fruity brightness. For an elegant table, dust the top with a light sprinkle of edible glitter or pastel sprinkles and finish with a few rose petals or mint leaves as garnish. Pair with a cup of Earl Grey or a bright sparkling lemonade to contrast the creamy frosting. This cake also works beautifully as mini layer cakes or cupcakes for individual servings at parties.
Velvet cakes trace their roots to American Southern baking traditions where red velvet became a showstopper thanks to cocoa and vinegar reactions creating a tender crumb and vibrant color. Pink velvet is a modern, playful adaptation that keeps the tender, buttery crumb but emphasizes a softer, rose hue rather than deep red. The technique borrows from classic American layered cakes — creaming, alternating wet and dry ingredients, and using acidic dairy to achieve tenderness — which makes it familiar yet contemporary for today’s celebrations.
In spring, fold diced strawberries into the filling and top with a few glazed berries for a seasonal flourish. For winter gatherings add a pinch of ground cardamom or orange zest to the batter for warming notes. Summer adaptations include lighter whipped cream frosting in place of the butter-heavy buttercream for outdoor events; stabilize whipped cream with a touch of mascarpone for structure. Holidays invite color swaps: pale green for St. Patrick’s Day or pastel blue for gender-neutral baby showers.
Plan ahead by baking the layers up to 2 days in advance and keeping them wrapped in the fridge. Prepare the frosting the day before and chill; bring it to room temperature and re-whip briefly before assembling. Store finished slices in airtight containers for grab-and-go desserts throughout the week. For weekday treats, turn the batter into a dozen cupcakes, freeze unfrosted, then thaw and frost as needed for quick desserts that feel homemade without nightly baking.
Whether you’re celebrating a milestone or simply craving something pretty and comforting, this Pink Velvet Cake is a joyful staple. It’s forgiving, impressive on the table, and full of approachable techniques that grow your confidence as a baker. Share a slice with someone you love and enjoy the way a simple homemade cake can turn an ordinary day into a small celebration.
Use room-temperature eggs and butter for a uniformly mixed batter and even rise.
Sift powdered sugar before adding to the frosting to avoid lumps and ensure silky texture.
Chill the cake between the crumb coat and final coat to make smoothing easier.
Start with a small amount of gel coloring and add more gradually to reach your desired shade.
This nourishing pink velvet cake recipe is sure to be a staple in your kitchen. Enjoy every moist, high protein slice — it is perfect for breakfast or as a wholesome snack any time.
This Pink Velvet Cake recipe makes perfectly juicy, tender, and flavorful steak every time! Serve with potatoes and a side salad for an unforgettable dinner in under 30 minutes.
Preheat oven to 350°F. Grease two 8-inch round cake pans and line the bottoms with parchment. Properly prepare pans to prevent sticking and help layers release cleanly.
Sift together flour, baking powder, baking soda, and salt into a bowl. Sifting removes lumps and incorporates air for a tender texture.
Cream butter and sugar until pale and fluffy, then add eggs one at a time. This step traps air for lift and creates a stable emulsion for even baking.
Alternate adding the dry mixture and buttermilk to the creamed butter, mixing on low and stopping when incorporated. Fold in extracts and gel coloring until evenly tinted.
Divide batter between prepared pans and bake 22–26 minutes at 350°F. Rotate pans halfway and test with a toothpick; it should come out with a few moist crumbs.
Beat cream cheese and butter until smooth, then add powdered sugar and vanilla. Adjust with milk for spreadable consistency. Chill briefly if too soft for assembly.
Level layers, spread filling, stack, crumb-coat, chill 20 minutes, then apply final coat and decorate. Chilling between coats produces a neater finish.
Last Step: Please leave a rating and comment letting us know how you liked this recipe! This helps our business to thrive and continue providing free, high-quality recipes for you.
Leave a comment & rating below or tag
@cozycookscorner on social media!
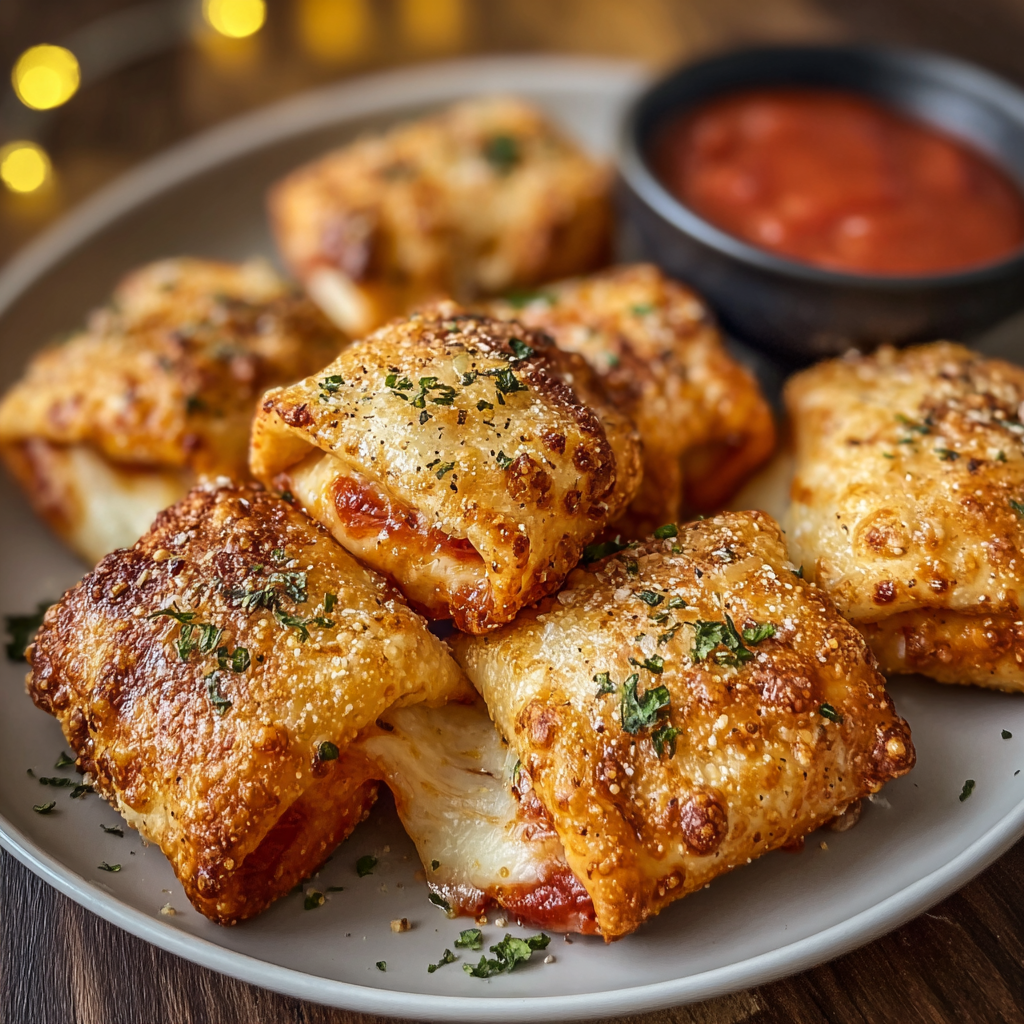
Golden, crispy pizza rolls made in the air fryer — a quick, family-friendly snack with melty cheese, pepperoni, and a marinara dip.

Light, crisp rice paper rolls filled with vermicelli, veggies and tofu or shrimp, finished in the air fryer for a healthy, crunchy snack.
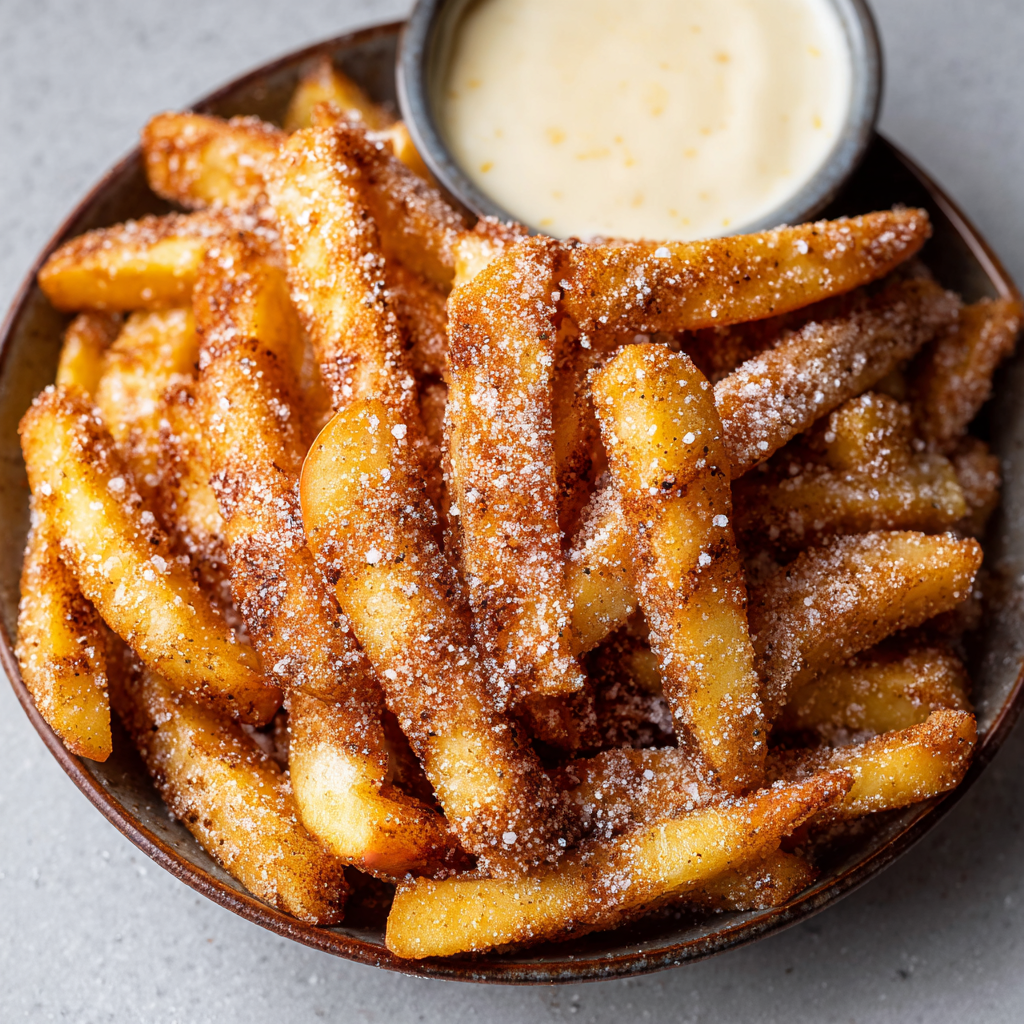
Crispy, cinnamon-sugar coated apple sticks air-fried to golden perfection — a quick, family-friendly snack that tastes like fall in every bite.
Leave a comment & rating below or tag @cozycookscorner on social media!
Enjoyed this recipe? Share it with friends and family, and don't forget to leave a review!
This recipe looks amazing! Can't wait to try it.
Comments are stored locally in your browser. Server comments are displayed alongside your local comments.

Join to receive our email series which contains a round-up of some of our quick and easy family favorite recipes.