
Onion Ring Chips

Thin, ultra-crispy onion rings coated in seasoned flour, buttermilk and panko — a crunchy snack that’s irresistible and perfect for sharing.

This batch of onion ring chips started as a way to use up extra onions before a weekend barbecue and turned into a household obsession. I discovered the thinner slicing method on a rainy afternoon while trying to reinvent the classic onion ring: I wanted something lighter, faster, and crunchier so people could eat a handful the way they might eat chips. The result has a delicate, shattering crunch from panko and the tang of buttermilk that helps the coating cling and brown beautifully. It’s become my go-to snack when friends drop by, and my kids now request them instead of store-bought crisps.
What makes these onion ring chips special is the balance of texture and seasoning — the onion softens just enough so it’s sweet and tender inside, while the exterior becomes an almost wafer-thin crisp. I first tested this at a family gathering where they disappeared within minutes. The steps are forgiving: you can prep ahead, use a shallow pan if you don’t have a deep fryer, and still get excellent results. The technique is simple, but a few small details — temperature control, proper draining, and the double-dredge system of flour, buttermilk, and panko — make all the difference.
Why You'll Love This Recipe
- Ready in about 30 minutes from start to finish when you slice the onions thinly and set up a simple dredging station, perfect for last-minute snacks and parties.
- Uses pantry staples: flour, garlic powder, paprika, panko, and basic seasonings — no specialized ingredients required.
- Make-ahead friendly: you can pre-slice onions and store them in the fridge for several hours, then bread and fry when guests arrive.
- Customizable crunch: the panko gives a light, shattering crisp — switch to finer breadcrumbs for a denser crust if you prefer.
- Great for crowds and versatile as an appetizer, side, or party finger food that pairs with a variety of dips like spicy mayo, ranch, or honey mustard.
From my own kitchen trials, I learned that slicing thickness is everything: 1/4 inch gives a chip-like crisp while still letting the onion remain tender. Family reactions have been universal — the first platter went so quickly at a summer picnic that I had to make another batch. The simple seasoning mix brings out the onion's sweetness without overwhelming the delicate texture.
Ingredients
- 2 large onions sliced into 1/4-inch rings: Choose yellow or sweet onions for a good balance of flavor and sweetness. Look for firm bulbs without soft spots. When sliced uniformly, they cook evenly and produce consistently thin chips.
- 1 cup all-purpose flour: I like King Arthur or a reliable store brand; flour dries the onion surface so the buttermilk adheres better, creating a crisp crust after frying.
- 1 teaspoon garlic powder: Adds savory depth without wet ingredients—works better than fresh garlic here because it won’t burn in the pan.
- 1 teaspoon paprika: Use sweet paprika for color and a gentle smoky note; smoked paprika will make a more assertive flavor if you prefer that profile.
- 1/2 teaspoon salt and 1/2 teaspoon black pepper: Salt helps draw moisture from the onion slightly and seasons the coating; adjust to taste, especially if serving with salty dips.
- 1 cup buttermilk: Use cultured buttermilk like Organic Valley or store-brand cultured buttermilk; it tenderizes the onion and gives the batter a pleasant tang that contrasts the fried exterior.
- 2 cups panko breadcrumbs: Japanese-style panko provides the signature flake-crisp texture. Brands like Kikkoman or generic panko work well; keep it dry in the fridge if you’re prepping ahead.
- Vegetable oil for frying: Use a neutral oil with a high smoke point such as peanut, canola, or vegetable oil (Wesson or similar). You’ll need enough oil to shallow- or deep-fry the rings.
Instructions
Prepare the onions: Peel and slice the onions into 1/4-inch rings. Separate into individual rings and pat them dry with paper towels. Uniform slices ensure even frying and prevent some rings from becoming overly soft while others are still raw. Make the seasoned flour: In a shallow bowl combine 1 cup flour, 1 teaspoon garlic powder, 1 teaspoon paprika, 1/2 teaspoon salt, and 1/2 teaspoon black pepper. Whisk to distribute spices evenly. This dry mix is the first barrier that helps the buttermilk adhere. Set up the dredging station: Place the seasoned flour in one shallow bowl, the buttermilk in a second bowl, and the panko in a third shallow dish. Working in batches prevents overcrowding and keeps the oil temperature stable. Coat the rings: Dust each ring lightly in flour, dip into buttermilk letting excess drip back into the bowl, then press into panko so the crumbs cling. For extra crunch, double-dredge by repeating the buttermilk and panko step once more. Heat the oil: Fill a heavy-bottomed pot or Dutch oven with at least 2 inches of oil and heat to 350°F. Use a deep-fry thermometer for accuracy. If the oil is too cool the coating will absorb oil; too hot and the outside will burn before the onion cooks. Fry in batches: Fry rings in small batches for 2 to 3 minutes per batch, turning once, until golden brown and crisp. Avoid overcrowding which drops oil temperature. Use a slotted spoon or spider to transfer rings to a paper-towel-lined sheet to drain. Season and serve: While still warm, sprinkle a light pinch of salt over the rings to enhance flavor. Serve immediately with your favorite dipping sauces for best texture.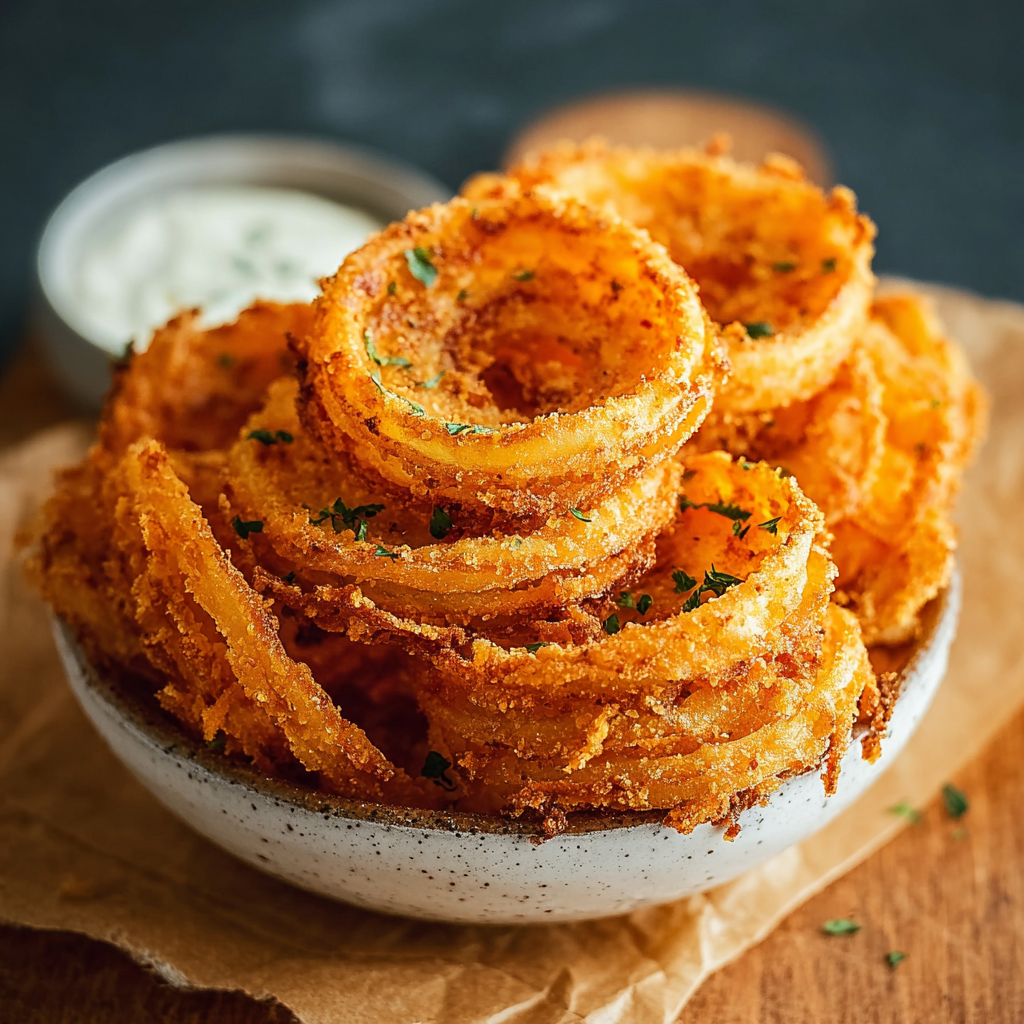
You Must Know
- These chips are best eaten immediately: they are crispiest right after frying and will soften if left at room temperature for long periods.
- Proper oil temperature (about 350°F) is crucial: too low and the coating soaks oil; too high and the exterior burns before the onion cooks through.
- The chips freeze well before frying; freeze single-layered on a tray, then transfer to a bag and fry from frozen for convenience.
- High in carbs and fat due to frying and breadcrumbs; enjoy as an occasional treat and pair with lighter sides if serving as part of a meal.
My favorite part is watching complete strangers try a chip and immediately search for another — it’s a simple pleasure. At family gatherings these have replaced store snacks; they’re crunchy, flavorful, and surprisingly easy to produce in large quantities once you have a rhythm. I often double the recipe for parties and keep a warming tray at low heat to preserve texture for short windows.
Storage Tips
Leftovers should be cooled completely and stored in an airtight container lined with paper towels for up to 24 hours in the refrigerator; however, refrigeration will soften the crust. For longer storage freeze the coated rings on a single layer until solid, then store in a freezer bag for up to 3 months. Reheat from frozen in a 400°F oven on a wire rack for 6 to 8 minutes or shallow-fry briefly at 350°F to regain crispness.
Ingredient Substitutions
If you don’t have buttermilk, make a quick substitute with 1 cup milk plus 1 tablespoon lemon juice or white vinegar, let sit 5 minutes. For a gluten-free variation, use gluten-free flour and gluten-free panko; results will be slightly different in texture. Swap panko for crushed cornflakes or crushed potato chips for a uniquely flavored crust. To reduce dairy, replace buttermilk with unsweetened plain yogurt thinned with a splash of milk, though the tang and tenderizing effect will differ slightly.
Serving Suggestions
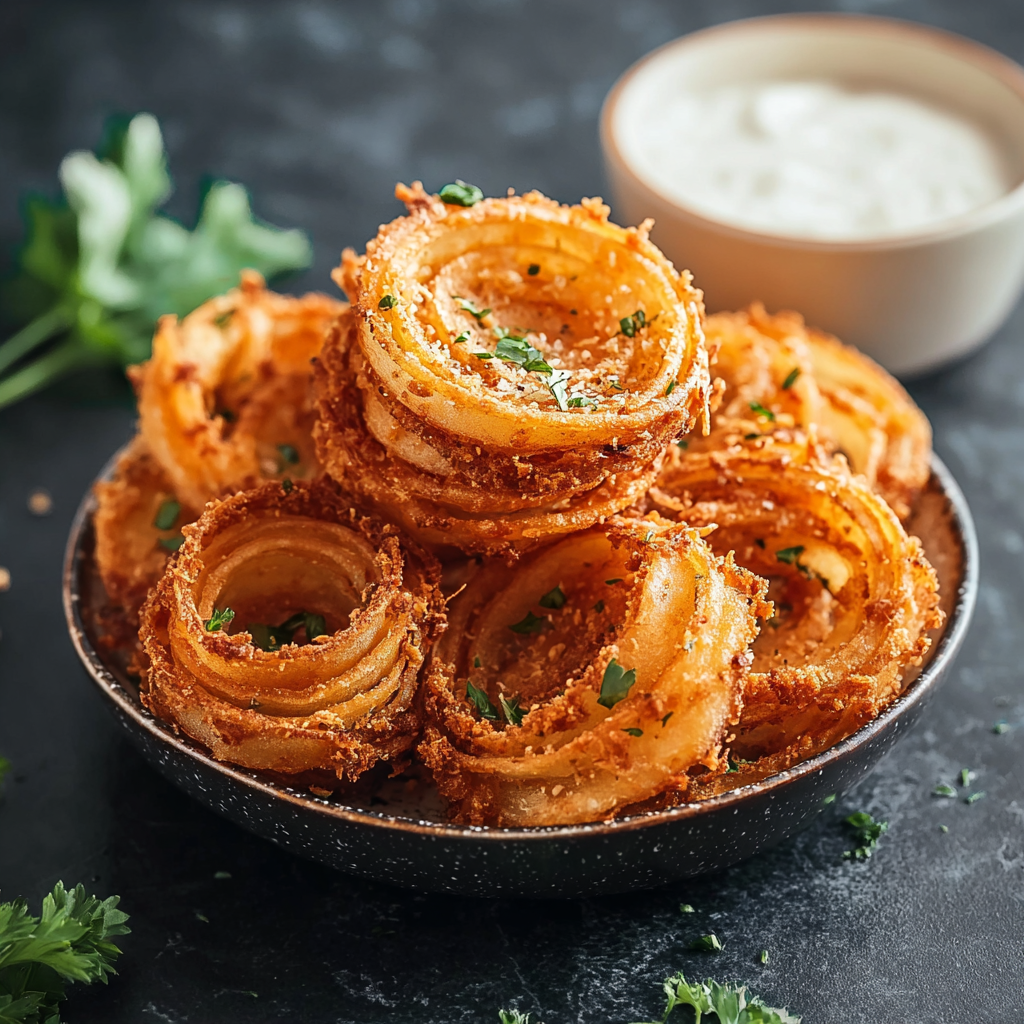
Serve hot with a trio of dips for variety: a spicy sriracha mayo, classic ranch, and honey mustard. These pair well with grilled burgers, sandwiches, or as an appetizer with a cold beer. Garnish with chopped chives or smoked paprika for color. For a more elevated presentation, place rings on a platter on top of crisp lettuce and add lemon wedges to brighten the flavors.
Cultural Background
Fried onion preparations exist across many cuisines — from British onion rings to Indian pakoras. This version leans on Japanese panko to create a lighter, flakier crust rather than the dense batter used in traditional American rings. The concept merges techniques from multiple culinary traditions to achieve an airy crunch that has become popular in modern snack culture.
Seasonal Adaptations
In summer, pair these with fresh herb dips and cold salads for outdoor gatherings. In colder months add warming spices like smoked paprika or a pinch of cayenne to the flour for depth. For holiday menus serve smaller rings as a bite-sized hors d'oeuvre with a dollop of cranberry-mustard for a festive touch.
Meal Prep Tips
Slice onions and store rings separated in the refrigerator up to 6 hours before frying to speed assembly. Prepare the dredging station on a tray so you can move quickly and maintain oil temperature. If serving a crowd, fry in rounds and keep finished chips on a wire rack in a 200°F oven for short intervals to keep warm without steaming them.
Whether you make a small batch for movie night or several pans for a backyard party, these onion ring chips are a satisfying, crunchy snack that rewards a little technique with big flavor. Enjoy experimenting with seasonings and dips, and consider these a fun blank canvas for your favorite flavor profiles.
Pro Tips
Maintain oil at about 350°F to ensure the coating crisps quickly without burning.
Pat onion rings completely dry before dredging to improve adhesion and crunch.
Work in small batches to avoid overcrowding and temperature drops that make the chips greasy.
Use a wire rack rather than paper towels to keep the underside crisp while draining excess oil.
This nourishing onion ring chips recipe is sure to be a staple in your kitchen. Enjoy every moist, high protein slice — it is perfect for breakfast or as a wholesome snack any time.
FAQs about Recipes
How thin should I slice the onions?
Slice the onions uniformly using a sharp knife or mandoline set to 1/4 inch to ensure even frying.
Can I prepare these ahead and freeze them?
Yes, you can freeze the coated rings before frying; freeze single-layered and then store in a bag. Fry from frozen for best convenience.
Tags
Onion Ring Chips
This Onion Ring Chips recipe makes perfectly juicy, tender, and flavorful steak every time! Serve with potatoes and a side salad for an unforgettable dinner in under 30 minutes.
Ingredients
Dry mix
Wet
Coating
Frying
Instructions
Prepare the onions
Peel and slice the onions into 1/4-inch rings. Separate the rings and pat dry with paper towels to remove surface moisture.
Make seasoned flour
Whisk together flour, garlic powder, paprika, salt, and pepper in a shallow bowl so the spices are evenly distributed.
Set up dredging station
Place the seasoned flour, buttermilk, and panko in three separate shallow bowls to create a smooth assembly line for breading.
Coat the rings
Dust each ring in flour, dip into buttermilk, then press into panko. For extra crunch double-dredge by repeating the buttermilk and panko step.
Heat the oil
Heat 2 inches of oil in a heavy pot to 350°F. Use a thermometer to maintain temperature within a narrow range while frying.
Fry in batches
Fry rings in small batches for 2–3 minutes until golden and crisp, turning once. Remove with a slotted spoon and drain on a wire rack.
Season and serve
Sprinkle lightly with salt while still warm and serve immediately with dipping sauces like sriracha mayo or ranch.
Last Step: Please leave a rating and comment letting us know how you liked this recipe! This helps our business to thrive and continue providing free, high-quality recipes for you.
Nutrition
Did You Make This?
Leave a comment & rating below or tag
@cozycookscorner on social media!
Categories:
You might also like...
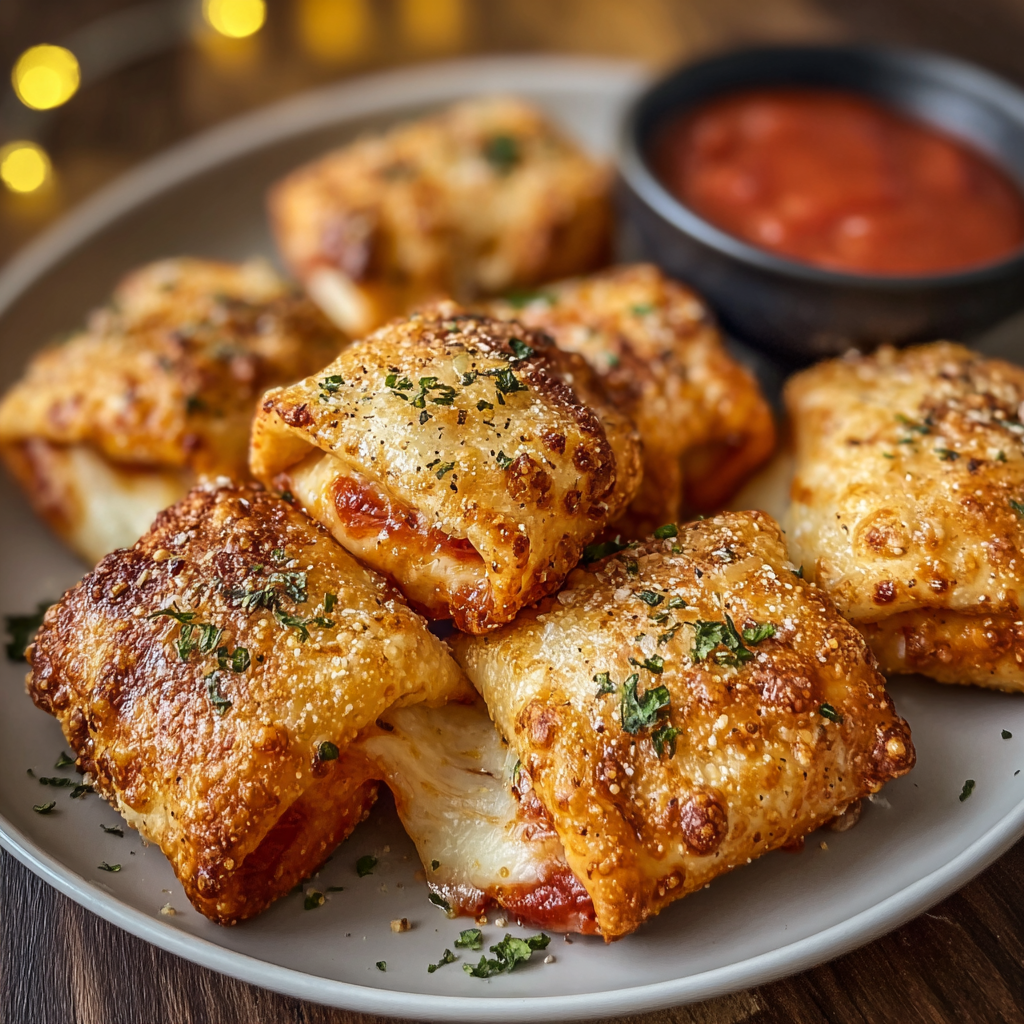
Air-Fried Pizza Rolls
Golden, crispy pizza rolls made in the air fryer — a quick, family-friendly snack with melty cheese, pepperoni, and a marinara dip.
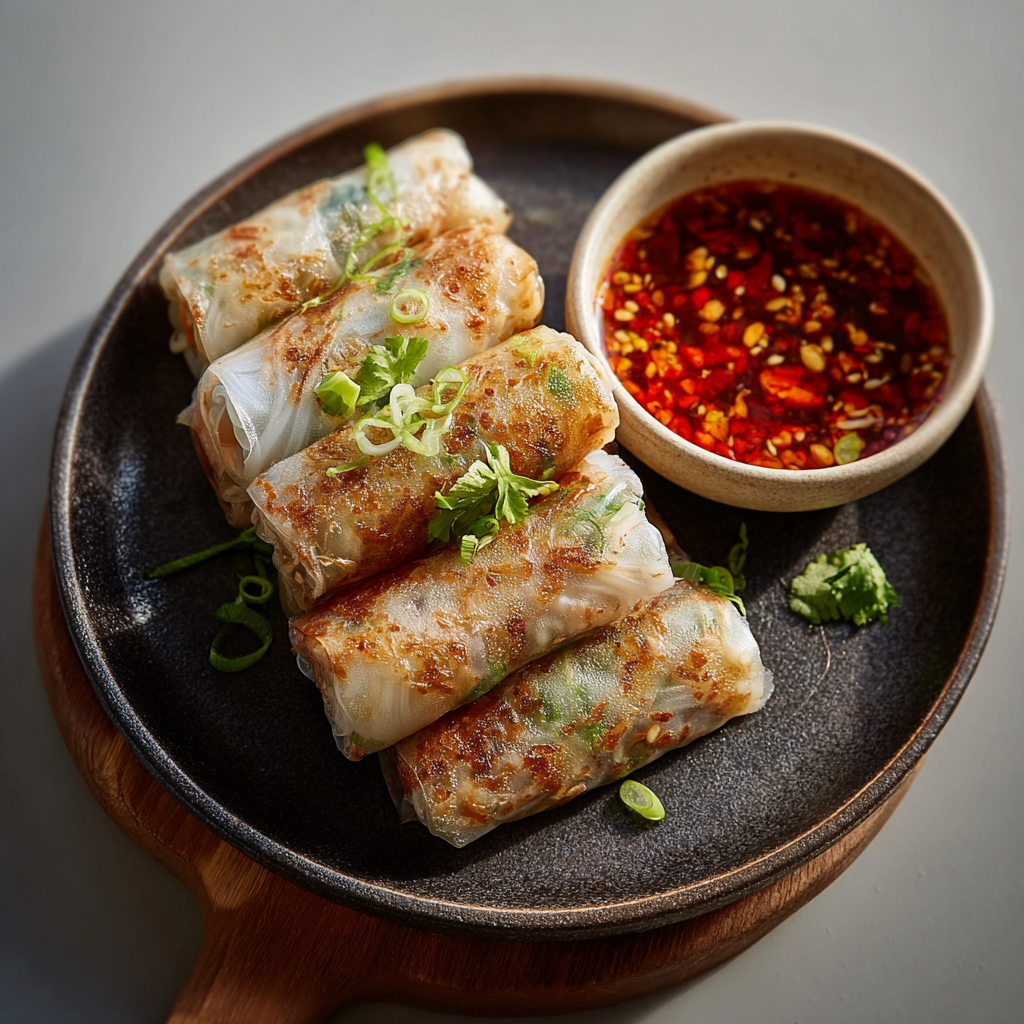
Air-Fried Rice Paper Noodle Rolls
Light, crisp rice paper rolls filled with vermicelli, veggies and tofu or shrimp, finished in the air fryer for a healthy, crunchy snack.
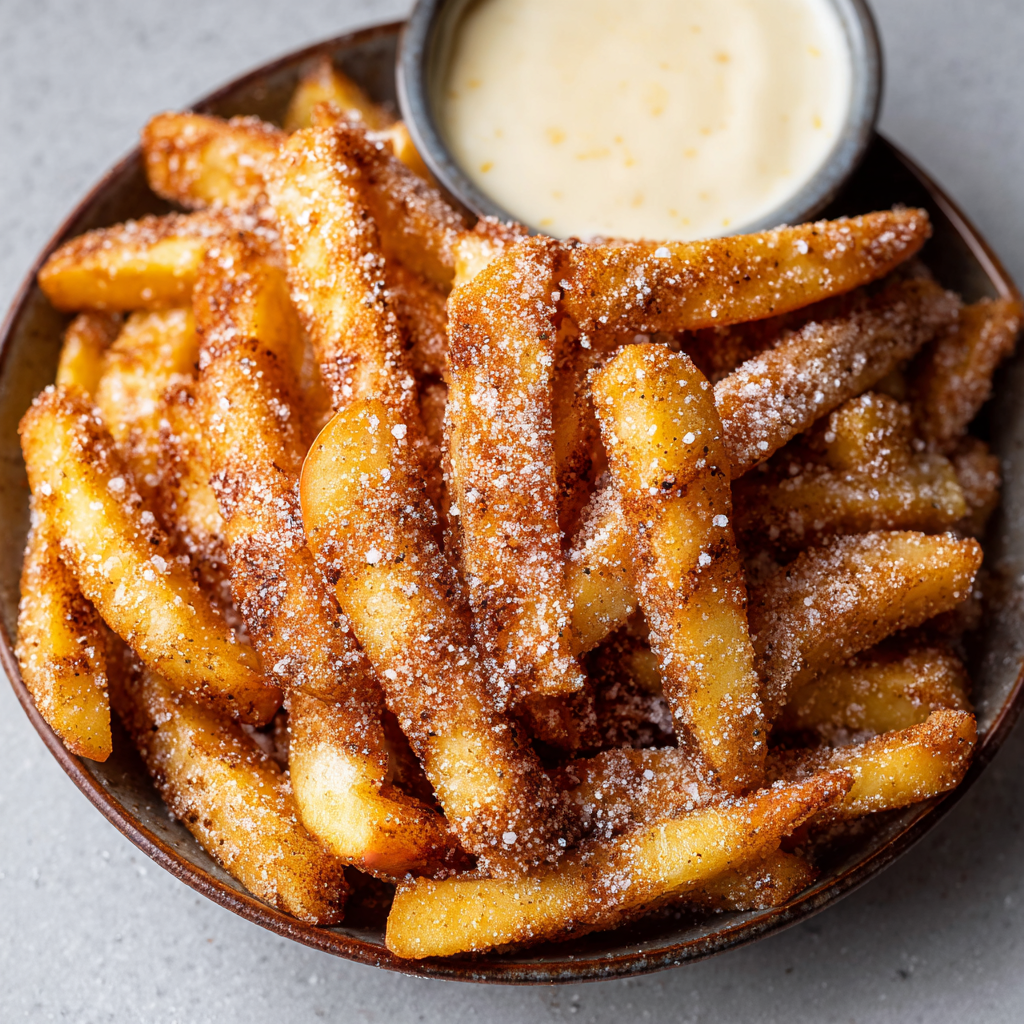
Air Fryer Apple Fries
Crispy, cinnamon-sugar coated apple sticks air-fried to golden perfection — a quick, family-friendly snack that tastes like fall in every bite.
Did You Make This?
Leave a comment & rating below or tag @cozycookscorner on social media!
Rate This Recipe
Share This Recipe
Enjoyed this recipe? Share it with friends and family, and don't forget to leave a review!
Comments (1)
This recipe looks amazing! Can't wait to try it.
Comments are stored locally in your browser. Server comments are displayed alongside your local comments.

Hi, I'm Lina!
What's Popular
30-Minute Meals!
Join to receive our email series which contains a round-up of some of our quick and easy family favorite recipes.