
Mini Chicken Pot Pies

Comforting, hand-sized pot pies made with flaky biscuit shells and a creamy chicken-and-veg filling — quick, kid-friendly, and freezer-ready.
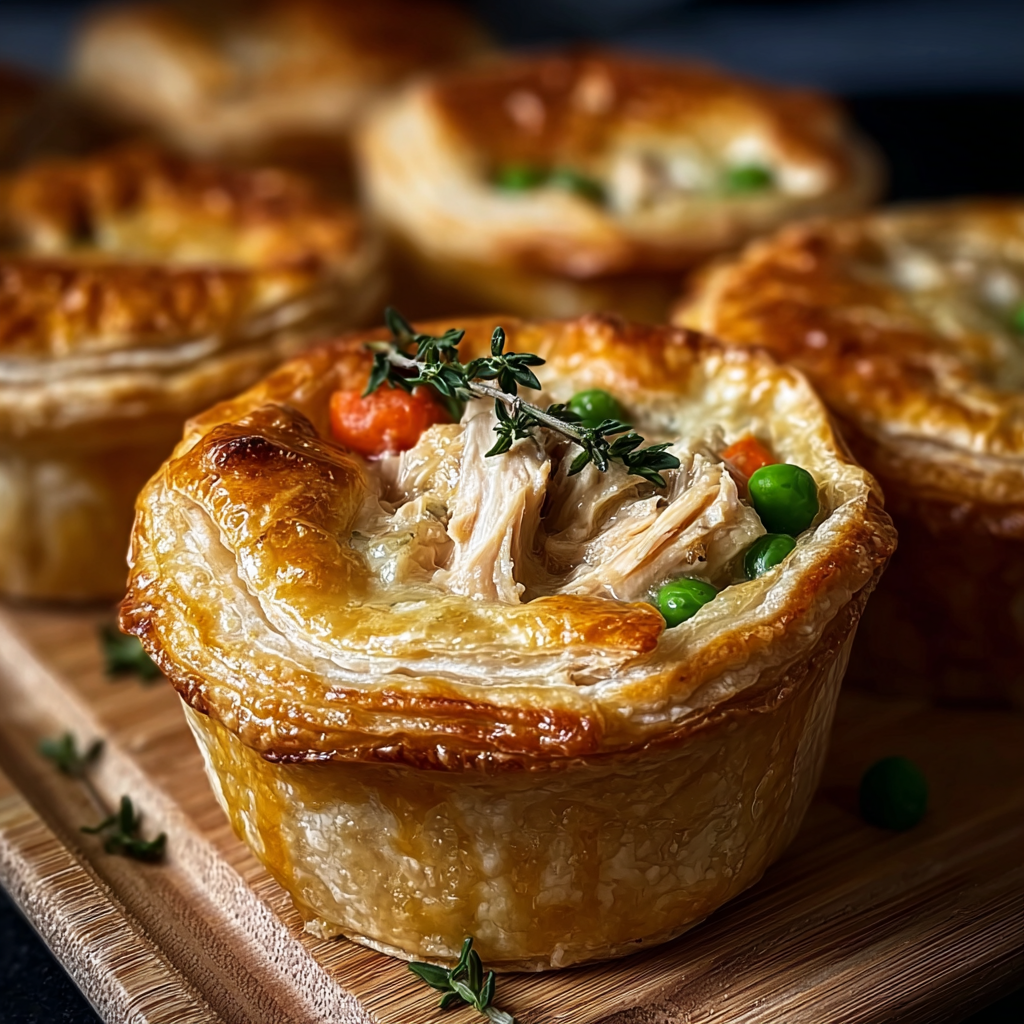
This recipe for mini chicken pot pies became a weeknight lifesaver the first time I made it during a chaotic dinner shift when both kids had activities and I had half an hour to put dinner on the table. These little pies capture everything I love about comfort food: a golden, flaky exterior and a warm, savory filling that’s creamy without being heavy. I discovered the combination of canned biscuit dough and condensed cream of chicken one rainy afternoon when I wanted something nostalgic and simple; the result was a crowd-pleaser that disappeared faster than I could plate it.
What makes these particularly special is how forgiving they are. You can use canned chicken for pantry convenience or shredded cooked chicken from a roast for deeper flavor. The texture contrast — tender vegetables and chicken wrapped in a crisp biscuit — always brings smiles at our table. On chilly nights they feel like a hug in food form; at busy potlucks they’re portable, shareable, and reliably popular. I love serving them with a small crisp salad to cut through the richness and watching guests pick them up by hand, steam still rising from the pockets of filling.
Why You'll Love This Recipe
- This dish comes together in about 35 minutes from start to finish, making it perfect for busy weeknights when you need a hearty meal fast.
- Ingredients are pantry-friendly: refrigerated flaky biscuits and cans of condensed soup simplify preparation without sacrificing comfort-food flavor.
- Flexible protein options — use canned chicken for convenience or 2 cups shredded roast chicken for richer taste — and a bag of frozen mixed vegetables keeps prep minimal.
- Make-ahead friendly: assemble in a muffin pan, refrigerate for up to 24 hours, or freeze for later reheating and serving to save time on busy days.
- Crowd-pleasing and portion-controlled: handheld, bite-friendly pies are ideal for parties, lunchboxes, or serving with soup or salad.
- Kid-approved textures and simple seasoning make this a family staple; you can easily adapt herbs and spices for adult palates.
Personally, my family’s reaction the first time I made these convinced me they belong in our rotation: my picky eater asked for seconds and my partner declared them "official comfort food." Over the years I’ve tweaked the filling seasoning and confirmed that a light hand with the salt and a short cool-down time prevents the filling from drowning the biscuits while ensuring the pies are piping hot inside.
Ingredients
- Flaky refrigerated biscuits: Use 2 cans of flaky layers refrigerated biscuits (commonly 8 biscuits per can). I reach for Pillsbury Grands flaky layers or a store-brand equivalent. They form the golden, buttery crust that’s crisp on the outside and tender inside.
- Condensed cream of chicken soup: 2 cans (10.5 oz each) condensed cream of chicken soup. This provides a smooth, savory base — Campbell’s or a comparable brand works well. If you prefer lighter sodium, look for reduced-sodium varieties and adjust seasoning.
- Cooked chicken: 2 cans of cooked chicken (about 12.5 oz each) drained, or 2 cups fresh cooked, shredded chicken (rotisserie or leftover roast). Dark-meat chicken adds extra richness; white meat keeps the filling milder.
- Frozen mixed vegetables: 1 bag (approx. 12 oz) frozen mixed vegetables, thawed and drained. A blend of peas, carrots, corn, and green beans works great. Thawing avoids excess moisture in the filling.
- Seasonings: Salt, black pepper, and 1/2 teaspoon each of dried thyme and parsley are my go-to. Fresh herbs (1 teaspoon chopped fresh thyme or parsley) can be used instead for brighter flavor.
Instructions
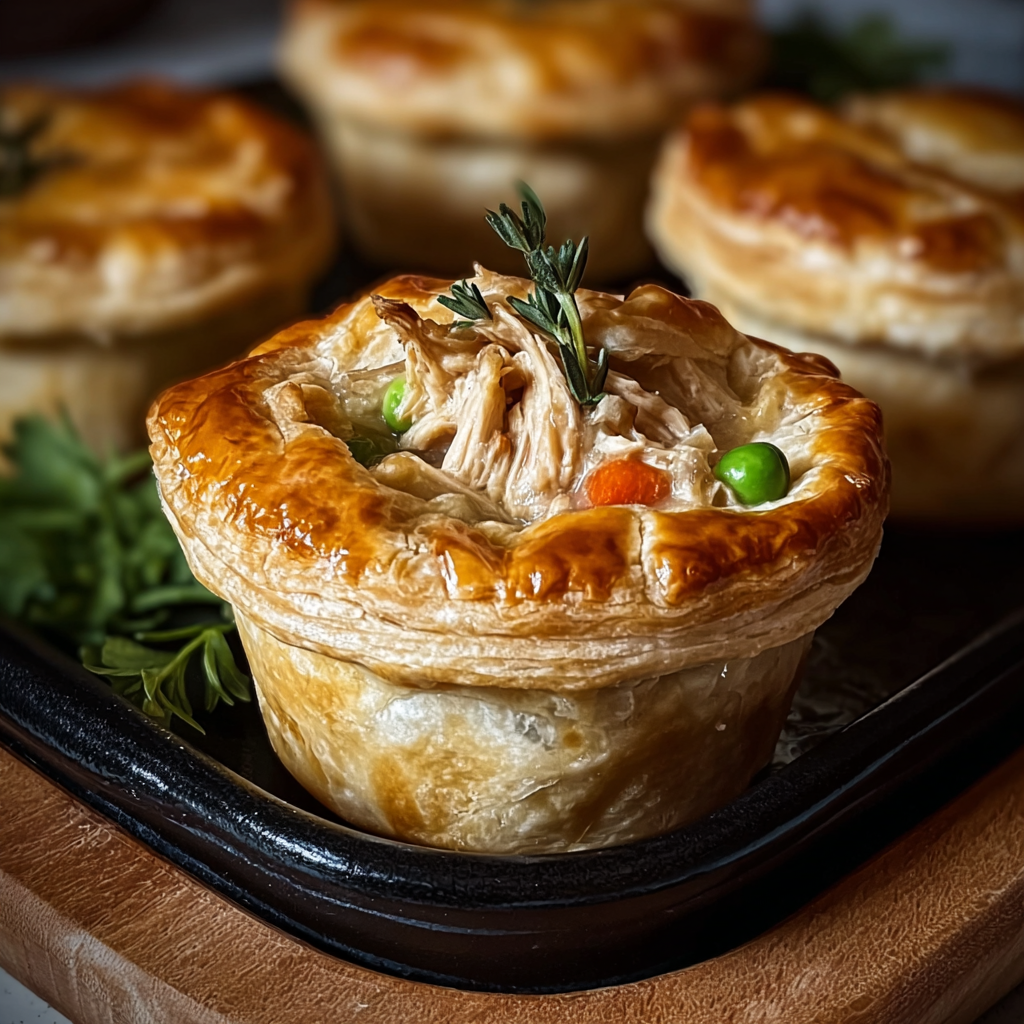
Preheat the oven: Set the oven to 400°F (200°C). Position a rack in the center so the biscuits brown evenly. Preheating thoroughly ensures the biscuit edges get crisp while the filling heats through in the allotted 20 minutes. Prepare the filling: In a large bowl, combine 2 cans (10.5 oz each) condensed cream of chicken soup, 2 cans drained cooked chicken (or 2 cups shredded cooked chicken), and 1 bag (12 oz) thawed mixed vegetables. Stir until combined and season with 1/2 teaspoon kosher salt, 1/4 teaspoon black pepper, and dried herbs. Taste and adjust — condensed soup can be salty, so season lightly. Flatten the biscuits: Open both biscuit cans and separate the individual pieces. Using the palm of your hand or a rolling pin, flatten each biscuit to about 1/8 to 1/4 inch thick. Flattening helps the biscuit line the muffin cup smoothly and prevents tearing when filled. Line the muffin pan: Press each flattened biscuit gently into the cups of a standard 12-cup muffin pan (for yields above 12, use the full 16 biscuits if available and a 16-cup pan). Make sure the biscuit forms a small crust up the sides to cradle the filling and create a neat rim when baked. Fill the shells: Spoon the chicken-vegetable-soup mixture into each biscuit-lined cup, filling about three-quarters full to allow room for bubbling. Avoid overfilling — the filling will be very hot after baking, and some spillover makes removal messy. Bake until golden: Place the muffin pan on a baking sheet to catch any drips and bake at 400°F for about 20 minutes, or until the biscuits are golden brown and the centers are hot and bubbly. Ovens vary; check at 18 minutes and add 2–3 minutes if needed. The filling should reach a safe internal temperature of at least 165°F. Cool and serve: Let the pies sit in the pan for 5 minutes after removing from the oven so the filling sets slightly, then gently run a small knife around each edge and lift out with a fork or small spatula. Serve warm.
You Must Know
- These hold and reheat very well: cooled pies keep in the refrigerator for up to 3 days and freeze for up to 3 months. Reheat from frozen in a 350°F oven for 15–20 minutes until hot.
- Using thawed, well-drained vegetables prevents a watery filling; if vegetables still release water after thawing, pat them dry with a paper towel.
- For a crispier bottom, prebake biscuit shells for 3–4 minutes before filling, then bake the assembled pies until golden.
- Calories and fat will vary by choice of biscuit and whether you use canned vs. fresh chicken; swapping in low-fat soup lowers calories slightly.
- This recipe scales easily: multiply filling ingredients and use extra biscuit cans or a second muffin pan to serve more guests.
My favorite thing about these pies is their adaptability: I’ve made them with leftover Thanksgiving turkey, rotisserie chicken, and even a vegetarian version with creamed corn and mushrooms that my neighbor loved. Family gatherings often include a platter of these, served warm with a quick green salad and crisp pickles on the side — they’re always the first to disappear.
Storage Tips
For short-term storage, place cooled pies in an airtight container lined with parchment or wax paper and refrigerate for up to 3 days. For longer storage, flash-freeze the pies on a baking sheet until solid, then transfer to a freezer-safe bag or container for up to 3 months. When reheating frozen pies, allow them to warm at room temperature for 10 minutes and reheat in a 350°F oven for 15–20 minutes, or until the center reaches 165°F. Microwaving will work for quick reheats but may soften the crust.
Ingredient Substitutions
If you want to reduce sodium, choose low-sodium condensed soup and taste before adding salt. Swap canned chicken for 2 cups shredded rotisserie chicken — it adds more texture and flavor. For gluten-free versions, use a gluten-free biscuit dough or small gluten-free pastry rounds; be aware the texture will differ slightly. To make a dairy-free version, use a dairy-free condensed-style soup alternative and a biscuit recipe without butter or milk. Vegetarian options include replacing chicken with chickpeas or cremini mushrooms combined with a vegetable-based creamy sauce.
Serving Suggestions
Serve these hand pies with a simple arugula and lemon-dressed salad, roasted root vegetables for a heartier plate, or a crisp coleslaw for contrast. Garnish with chopped fresh parsley or chives for color and a fresh pop. For brunch, pair with scrambled eggs and roasted tomatoes; for a party, offer them on a platter with dipping sauces like a mild honey-mustard or a tangy herb yogurt dip.
Cultural Background
Hand-held savory pies have a long history across many cuisines — from British meat pies to American pot pies and empanadas. The concept of encasing a savory filling in pastry is a comforting, practical solution historically used to transport food or make the most of leftovers. This simplified version, using refrigerated biscuit dough and condensed soup, evolved in mid-20th-century American kitchens as a quick, convenient interpretation of classic pot pies, leaning on accessible pantry staples and time-saving shortcuts.
Seasonal Adaptations
Adjust the vegetables to the season: swap thawed mixed vegetables for roasted squash and Brussels sprouts in autumn, or asparagus and peas in spring. For holiday meals, use leftover turkey with cranberry relish on the side for a festive twist. In summer, stir in fresh sweet corn and basil to brighten the filling. The key is to keep the balance between tender vegetables and a creamy binder so the biscuits still bake to a golden color.
Meal Prep Tips
To streamline weeknight meals, prepare the filling two days ahead and keep it refrigerated in an airtight container. When ready to bake, simply press biscuits into the muffin tin, portion the chilled filling, and bake. For freezer-friendly make-ahead meals, assemble pies on a baking sheet, freeze solid, then transfer to a labeled bag — bake from frozen for about 20–25 minutes at 375°F until heated through and crust is golden.
Making these little pies became one of those feel-good shortcuts I’m happy to recommend: they respect time constraints without sacrificing the warmth and satisfaction of a homemade meal. Bring them to your next gathering or tuck a few in the freezer for busy nights — they won’t disappoint.
Pro Tips
Pat thawed vegetables dry to prevent a watery filling and help the crust stay crisp.
If using a standard 12-cup muffin tin and 16 biscuits, bake in two batches to avoid overcrowding the oven.
Let pies rest 5 minutes in the pan before removing to let the filling set and make removal cleaner.
For a deeper flavor, use shredded rotisserie chicken and add a teaspoon of Dijon mustard to the filling.
This nourishing mini chicken pot pies recipe is sure to be a staple in your kitchen. Enjoy every moist, high protein slice — it is perfect for breakfast or as a wholesome snack any time.
FAQs about Recipes
Can I use fresh chicken instead of canned?
Yes. Use pre-cooked shredded chicken (about 2 cups) or two cans of cooked chicken drained. Rotisserie chicken gives extra flavor.
How long do mini pies keep in the freezer?
Freeze on a tray until solid, then transfer to a freezer-safe bag for up to 3 months. Reheat in a 350°F oven from frozen for 15–20 minutes.
Tags
Mini Chicken Pot Pies
This Mini Chicken Pot Pies recipe makes perfectly juicy, tender, and flavorful steak every time! Serve with potatoes and a side salad for an unforgettable dinner in under 30 minutes.
Ingredients
Main
Instructions
Preheat the oven
Preheat oven to 400°F (200°C) and position a rack in the center. Proper preheating promotes even browning of the biscuit shells while the filling heats through in 20 minutes.
Mix the filling
In a large bowl combine 2 cans condensed cream of chicken soup, 2 cans drained cooked chicken (or 2 cups shredded), and 1 bag thawed mixed vegetables. Season with salt, pepper and herbs; stir until uniform.
Flatten biscuits
Open biscuit cans and flatten each biscuit to about 1/8–1/4 inch thick with your palm or rolling pin so they easily line muffin cups without tearing.
Line muffin cups
Press each flattened biscuit into the cups of a greased muffin pan, forming a small crust up the sides to hold the filling and create a neat rim when baked.
Fill the shells
Spoon the chicken mixture into each biscuit-lined cup, filling three-quarters full to allow room for bubbling. Avoid overfilling to prevent spillover during baking.
Bake
Place the muffin pan on a sheet and bake at 400°F for 18–22 minutes, until biscuits are golden and filling is hot and bubbly. Check that centers reach 165°F.
Cool and serve
Let pies cool for 5 minutes in the pan so the filling sets. Run a small knife around the edges and lift out with a spatula. Serve warm.
Last Step: Please leave a rating and comment letting us know how you liked this recipe! This helps our business to thrive and continue providing free, high-quality recipes for you.
Nutrition
Did You Make This?
Leave a comment & rating below or tag
@cozycookscorner on social media!
Categories:
You might also like...
Air-Fried Pizza Rolls
Golden, crispy pizza rolls made in the air fryer — a quick, family-friendly snack with melty cheese, pepperoni, and a marinara dip.
Air-Fried Rice Paper Noodle Rolls
Light, crisp rice paper rolls filled with vermicelli, veggies and tofu or shrimp, finished in the air fryer for a healthy, crunchy snack.
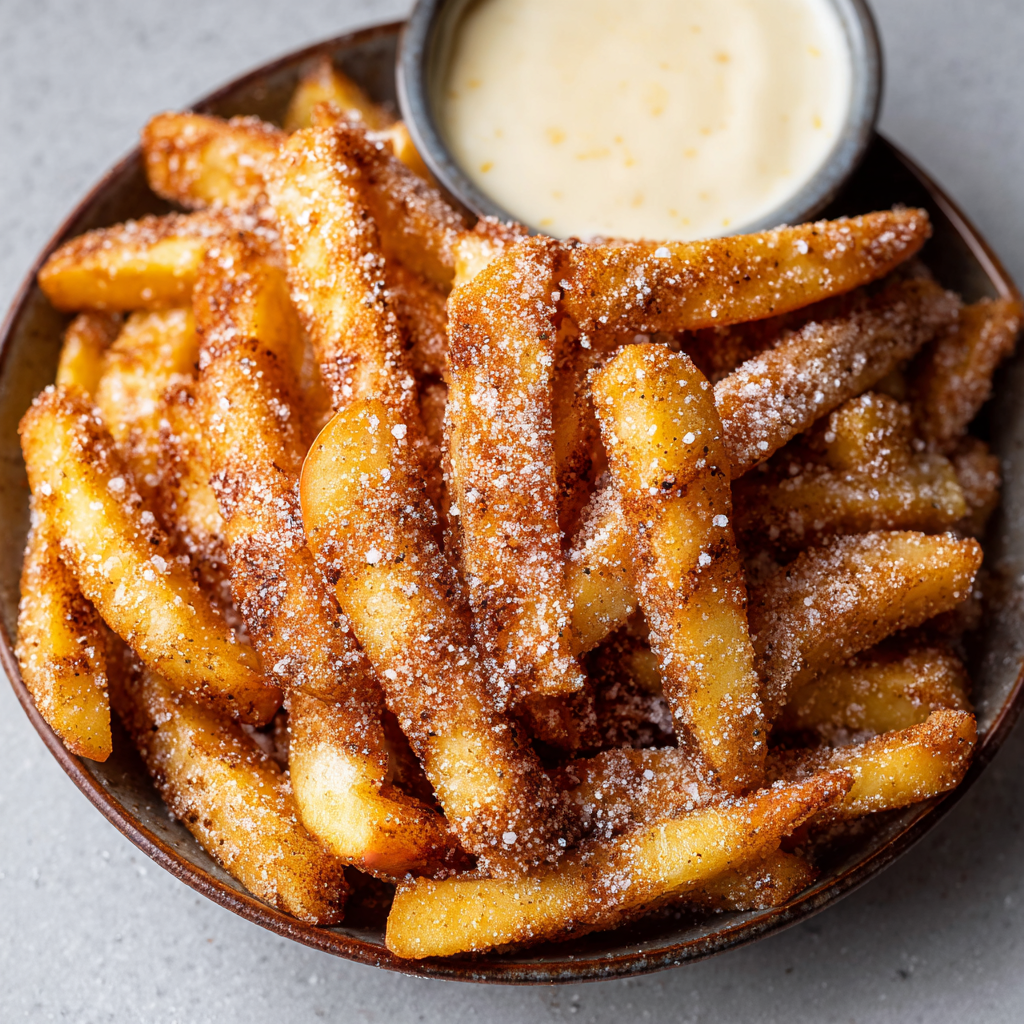
Air Fryer Apple Fries
Crispy, cinnamon-sugar coated apple sticks air-fried to golden perfection — a quick, family-friendly snack that tastes like fall in every bite.
Did You Make This?
Leave a comment & rating below or tag @cozycookscorner on social media!
Rate This Recipe
Share This Recipe
Enjoyed this recipe? Share it with friends and family, and don't forget to leave a review!
Comments (1)
This recipe looks amazing! Can't wait to try it.
Comments are stored locally in your browser. Server comments are displayed alongside your local comments.

Hi, I'm Lina!
What's Popular

30-Minute Meals!
Join to receive our email series which contains a round-up of some of our quick and easy family favorite recipes.