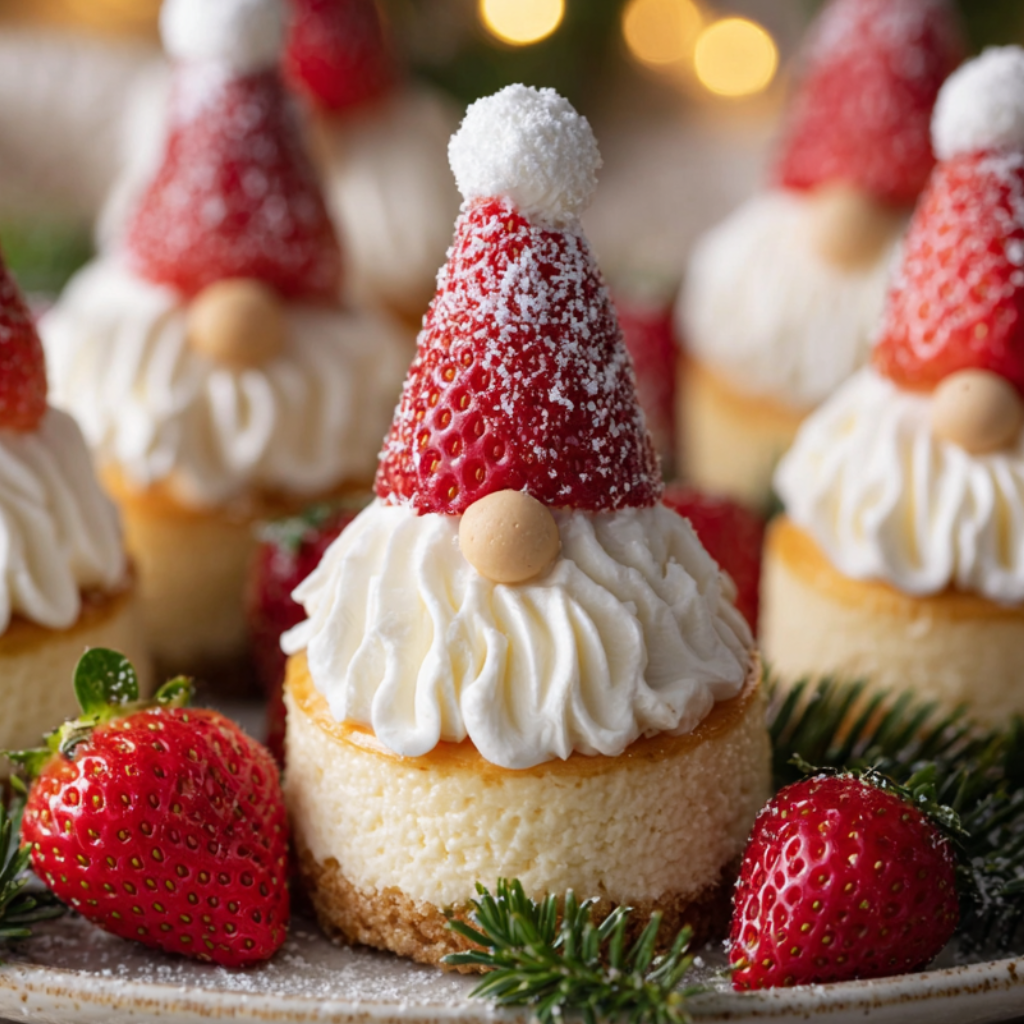
Gnome Mini Cheesecakes

Adorable individual cheesecakes topped with tiny cone hats and marshmallow beards—perfect for parties, holidays, and cozy gatherings.
This batch of Gnome Mini Cheesecakes began as a playful experiment one December afternoon when I wanted a dessert that looked whimsical but tasted timeless. I grew up with classic cheesecake at family gatherings, rich and velvety, but I wanted something portable and fun for a cookie exchange. Turning the classic into individual portions and adding tiny cone hats felt like giving a familiar flavor a mischievous personality. The result was so charming that neighbors asked if the gnomes could come to every holiday party.
The texture is what keeps me coming back: a crisp crumb base that gives way to a smooth, tangy filling, topped with a cloud of whipped cream and a little hat that crunches on the first bite. The balance between the buttery crust and the slightly tangy cream cheese filling is the hallmark of a good cheesecake, and these mini versions concentrate that flavor into a single, satisfying mouthful. I discovered a couple of tricks—room-temperature cream cheese, gentle mixing, and a quick water bath for the muffin tin—that transformed the texture from dense to silk. If you love small-batch baking and a dash of whimsy, these are for you.
Why You'll Love This Recipe
- Makes 12 perfectly portioned treats that are easy to transport and share at parties, brunches, or holiday gatherings.
- Uses pantry-friendly ingredients like cream cheese, sugar, and graham crackers, so you can usually make them on short notice.
- Ready to bake in about 25 minutes active time and about 45 minutes including oven time; chilling overnight gives best results but you can serve after 2 hours.
- Customizable toppings let you adapt to dietary needs or seasonal flavors—swap fruit for chocolate, or use gluten-free crumbs for a celiac-friendly option.
- Decorating is simple and kid-friendly: small cones become hats, and a dab of whipped cream makes an instant beard and nose.
- Great for make-ahead entertaining: assemble ahead and chill or freeze for easy finishing on the day of your event.
When I first served these at a neighborhood potluck, kids clustered around the platter and adults kept going back for seconds. The playful look starts conversations, and the easy technique makes them a repeat hit in my household. I often scale the filling for twice the batch when guests are coming.
Ingredients
- Crust: Use finely crushed graham crackers for the best texture. I prefer the classic Honey Maid brand for consistent flavor. The crumbs should measure about 1 1/2 cups; combine with melted unsalted butter and a touch of sugar so the base sets firm.
- Filling: Full-fat cream cheese (2 packages, 8 oz each) gives the silkiest mouthfeel—avoid low-fat varieties if you want that classic richness. Bring to room temperature first so the batter is lump-free. Granulated sugar, a large egg, a spoonful of sour cream, and vanilla extract round out the profile and add a subtle tang.
- Decorations: Mini sugar cones or small ice cream cones make the best gnome hats—about 12 cones. Use store-bought whipped cream or pipe stabilized whipped cream to hold shape. Small round candies, marzipan balls, or a dab of cream for the nose complete each gnome.
- Optional add-ins: A tablespoon of lemon zest for brightness, 2 tablespoons of melted bittersweet chocolate for marbling, or 1/4 cup raspberry jam swirled on top for a fruity note.
Instructions
Prepare the muffin tin and crust: Preheat the oven to 325°F. Line a 12-cup muffin tin with paper liners. Combine 1 1/2 cups finely crushed graham crackers, 6 tablespoons melted unsalted butter, and 2 tablespoons granulated sugar in a bowl. Press about 1 tablespoon of mixture into the bottom of each liner until compact and even. Bake the crusts for 5 minutes to set, then remove and cool slightly. Make the filling: Beat 16 ounces (2 packages) room-temperature cream cheese on medium speed until smooth, about 2 minutes. Add 3/4 cup granulated sugar and beat until combined. Mix in 1 large room-temperature egg, 1/2 cup sour cream, 1 teaspoon vanilla extract, and 1 tablespoon lemon juice or zest if using. Scrape the bowl to ensure a homogeneous batter but avoid overbeating to prevent air pockets. Fill the cups: Divide the filling evenly among the 12 crust-lined cups, filling each almost to the top but leaving a little room for expansion. Tap the tin gently on the counter to release large air bubbles; smooth the tops with an offset spatula for a clean finish. Bake gently: Bake at 325°F for 15 to 18 minutes until the edges are set and the centers still have a slight jiggle. To reduce cracking, set the muffin pan on a shallow water bath by placing the tin on a larger baking tray lined with a kitchen towel and adding hot water to come halfway up the sides of the muffin tin—this moderates oven heat and provides steam. Cool and chill: Turn off the oven, crack the door, and let the tin sit for 20 minutes to cool gradually. Remove and transfer the mini cheesecakes to a cooling rack, then chill in the refrigerator for at least 2 hours or overnight for the best texture and flavor. Decorate into gnomes: When chilled, pipe or spoon whipped cream to form a small beard on each mini. Place a mini cone on top as the hat, trim if needed for scale. Add a small candy or marzipan ball to the center of the beard as the nose. Dust lightly with powdered sugar for a snowy finish if desired.
You Must Know
- These keep well refrigerated up to 4 days in an airtight container; freeze individually wrapped for up to 1 month and thaw overnight in the fridge.
- Room-temperature ingredients and gentle mixing prevent a grainy texture—don’t rush the cream cheese softening step.
- Using a shallow water bath during baking reduces the risk of cracks and creates a smoother top.
- Mini cones can soften over time if refrigerated; assemble hats shortly before serving for the best crunch.
I love how these small desserts bring out creative decorating from guests—my niece once made a whole gnome village on a tray, and now that's an annual tradition. The best part is the little faces peeking out of the packaging when I take them to a neighborhood party.
Storage Tips
Store finished minis in a single layer in an airtight container in the refrigerator for up to 4 days. If you need to stack them, place parchment sheets between layers to preserve decorations. For longer storage, freeze without the cones and whipped cream: flash-freeze on a tray until solid, then transfer to a freezer-safe container for up to 1 month. Thaw in the refrigerator overnight before decorating and serving. To re-crisp mini cones, briefly heat in a 300°F oven for 3 to 5 minutes before placing on the chilled cheesecakes.
Ingredient Substitutions
For a gluten-free option, replace graham crackers with gluten-free graham crumbs or finely ground gluten-free cookies in the same 1 1/2 cup measure. Vegan or dairy-free switches require vegan cream cheese and a flax or aquafaba binder instead of egg; texture will be slightly different but still delightful. Swap sour cream for full-fat Greek yogurt for a tangier profile. To make nutty bases, use finely ground almond flour mixed with 2 tablespoons of extra butter, noting this will add a denser mouthfeel.
Serving Suggestions
Arrange the minis on a festive platter with a scattering of fresh berries and mint leaves for contrast. Pair with espresso or a light dessert wine for an elegant finish. For brunch, offer alongside cinnamon-spiced fruit and small jars of preserves so guests can personalize their gnomes. Add edible glitter or metallic sugar for celebratory presentations. These make a whimsical centerpiece for holiday cookie swaps or a signature treat on a dessert table.
Cultural Background
Mini cheesecakes are a playful offshoot of the classic New York-style cheesecake, which evolved in America using cream cheese in the late 19th century. Individual portions have roots in European tart and petit four traditions, where bite-sized desserts were favored for communal dining. The gnome decoration is a modern, whimsical twist inspired by Nordic folklore and contemporary food styling trends that celebrate handmade charm—pairing timeless flavors with adorable presentation.
Seasonal Adaptations
Spring calls for lemon zest and a berry compote, while autumn benefits from a pumpkin puree swirl and warm spices. For winter holidays, top with cinnamon-dusted whipped cream and a sprinkle of crushed peppermint. Summer versions are lovely with fresh peaches or mango coulis. Adjust the cone type and decorative elements seasonally—use pastel candies in spring or spiced caramel drips for fall gatherings.
Meal Prep Tips
If you’re prepping for a party, bake the bases and filling a day ahead and chill overnight; assemble hats and final decorations the day of to maintain crunch and visual appeal. Use piping bags to speed up whipped cream application and keep extra cones and candies in labeled bins for quick finishing. Pack minis in cupcake carriers for safe transport and display them at room temperature for 20 minutes before serving to enhance flavor.
These tiny gnome delights combine nostalgia with a playful modern edge—share them, gift them, and make them your own. They’re a simple way to bring warmth and whimsy to the table, and I hope they become a small but memorable part of your gatherings too.
Pro Tips
Bring cream cheese and egg to room temperature before mixing to avoid lumps and grainy texture.
Use a shallow water bath during baking to reduce cracking and produce a creamier top.
Chill at least 2 hours, preferably overnight, for the best texture and easiest decorating.
Assemble cone hats just before serving to maintain their crunch.
This nourishing gnome mini cheesecakes recipe is sure to be a staple in your kitchen. Enjoy every moist, high protein slice — it is perfect for breakfast or as a wholesome snack any time.
FAQs about Recipes
How long do Gnome Mini Cheesecakes keep?
Yes. Store the assembled cheesecakes in the refrigerator for up to 4 days. For longer storage, freeze without the cones and whipped cream for up to one month and thaw overnight in the fridge before decorating.
Any tips to avoid cracks?
Room-temperature ingredients ensure a smooth batter. Beat cream cheese until fully smooth before adding sugar, and avoid overbeating the final batter to prevent air pockets and cracks.
Tags
Gnome Mini Cheesecakes
This Gnome Mini Cheesecakes recipe makes perfectly juicy, tender, and flavorful steak every time! Serve with potatoes and a side salad for an unforgettable dinner in under 30 minutes.
Ingredients
Crust
Filling
Toppings & Decorations
Instructions
Preheat and prepare
Preheat oven to 325°F. Line a 12-cup muffin tin with liners. Combine graham crumbs, melted butter, and sugar, then press about 1 tablespoon into each cup and bake for 5 minutes to set.
Make the batter
Beat softened cream cheese until smooth. Add sugar and mix until combined. Incorporate the egg, sour cream, vanilla, and lemon if using, scraping the bowl to ensure a homogeneous batter.
Fill the cups
Divide the filling evenly among the prepared crusts, tapping the pan on the counter to release air bubbles and smoothing the tops with an offset spatula.
Bake gently
Bake for 15 to 18 minutes until edges are set and centers slightly jiggle. Optionally place the muffin tin in a shallow water bath to minimize cracking.
Cool slowly
Turn off the oven, crack the door, and allow the tin to cool inside for 20 minutes. Remove and transfer to a cooling rack, then chill in the refrigerator for at least 2 hours.
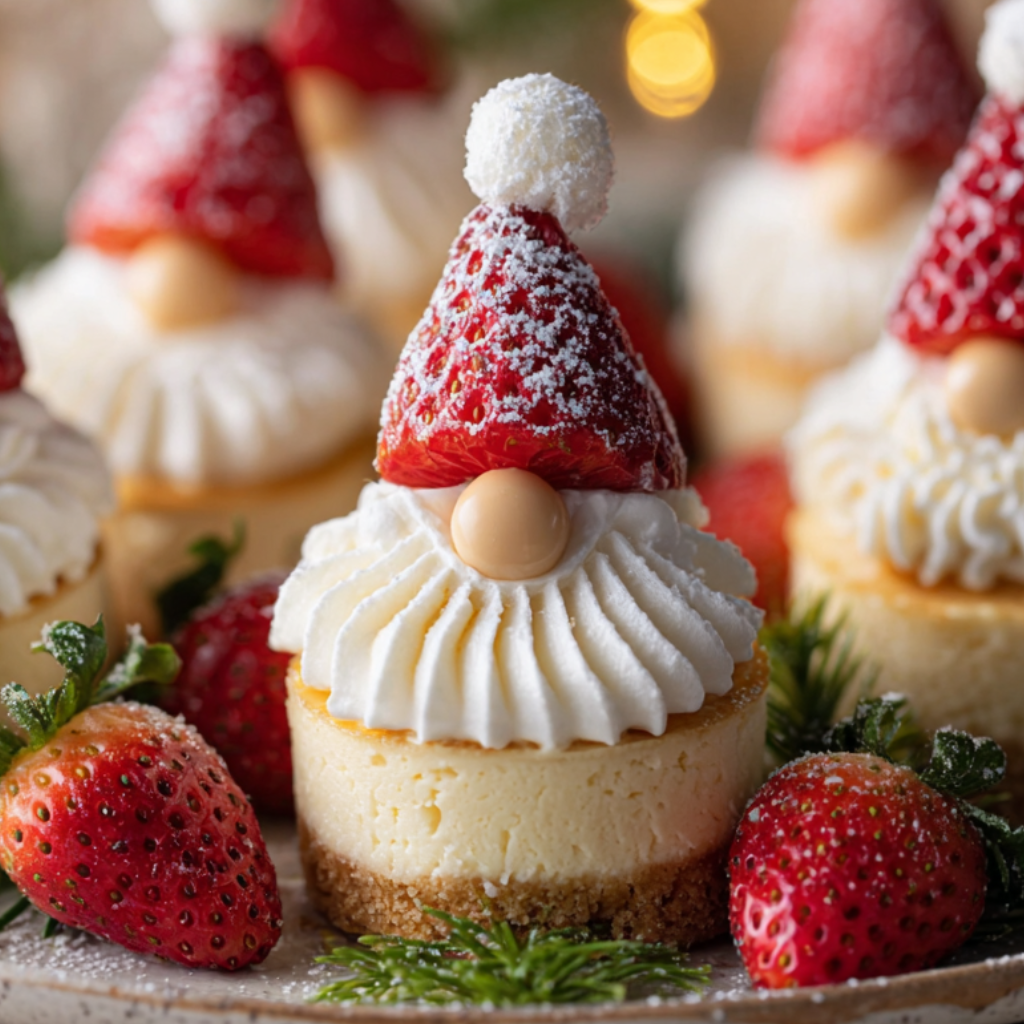
Decorate as gnomes
Pipe whipped cream to form beards, set a mini cone on top as the hat, and add a small candy or marzipan ball as the nose. Dust with powdered sugar if desired.
Last Step: Please leave a rating and comment letting us know how you liked this recipe! This helps our business to thrive and continue providing free, high-quality recipes for you.
Nutrition
Did You Make This?
Leave a comment & rating below or tag
@cozycookscorner on social media!
Categories:
You might also like...

Air-Fried Pizza Rolls
Golden, crispy pizza rolls made in the air fryer — a quick, family-friendly snack with melty cheese, pepperoni, and a marinara dip.

Air-Fried Rice Paper Noodle Rolls
Light, crisp rice paper rolls filled with vermicelli, veggies and tofu or shrimp, finished in the air fryer for a healthy, crunchy snack.
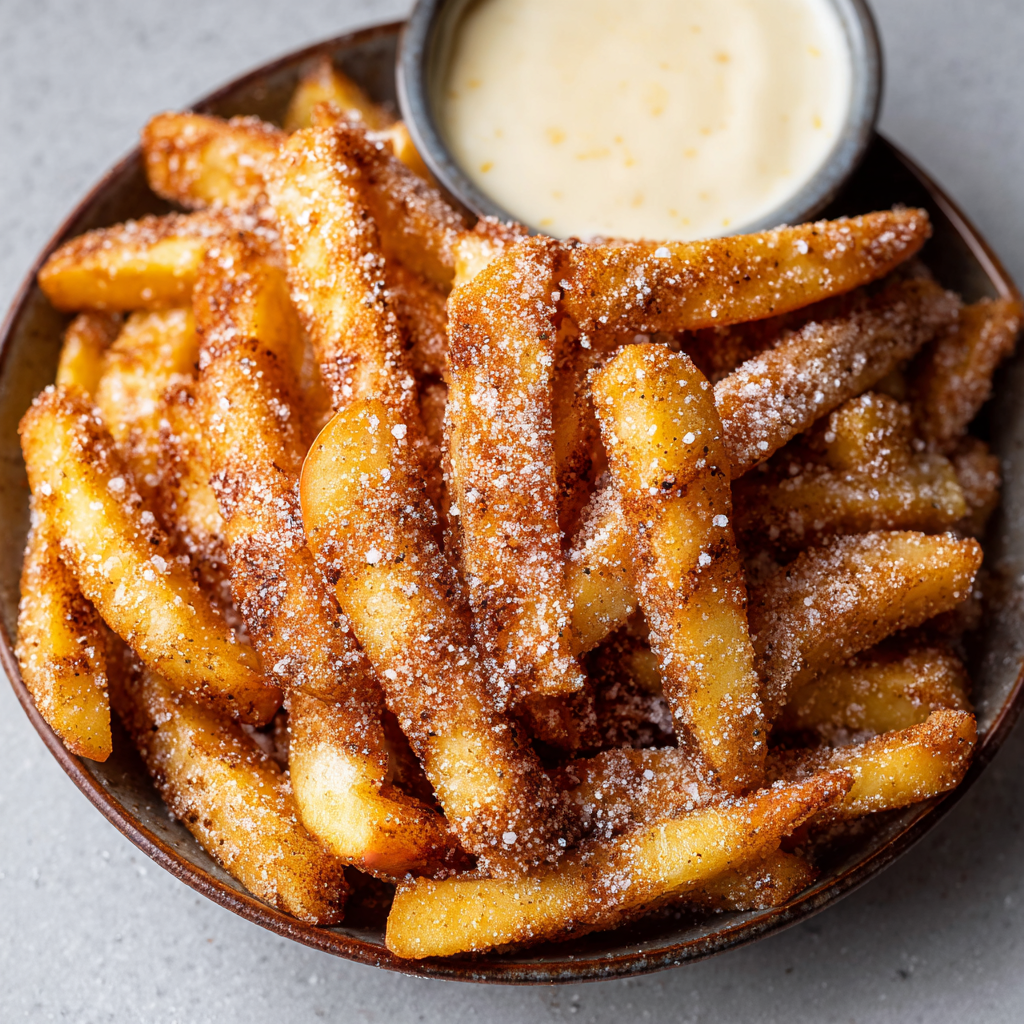
Air Fryer Apple Fries
Crispy, cinnamon-sugar coated apple sticks air-fried to golden perfection — a quick, family-friendly snack that tastes like fall in every bite.
Did You Make This?
Leave a comment & rating below or tag @cozycookscorner on social media!
Rate This Recipe
Share This Recipe
Enjoyed this recipe? Share it with friends and family, and don't forget to leave a review!
Comments (1)
This recipe looks amazing! Can't wait to try it.
Comments are stored locally in your browser. Server comments are displayed alongside your local comments.

Hi, I'm Lina!
What's Popular

30-Minute Meals!
Join to receive our email series which contains a round-up of some of our quick and easy family favorite recipes.